Checking eggs for fertility is one of those skills that takes a little practice but pays off quickly. My first few breeding seasons, I just waited and hoped. Eventually I learned to candle, and it changed how I manage every clutch. You can tell a lot from a tiny egg held up to a light, and knowing what you're looking at makes the whole breeding process far less stressful.
This guide walks through exactly how to candle, what fertile and infertile eggs actually look like, and when to check so you're not doing it too early or disturbing the nest more than necessary.
When to Start Checking
Timing is everything with candling. Check too early and you'll see nothing useful. Check too often and you risk stressing the parents or cooling the eggs. Here's the window that works:
- Before day 4: Skip it. Visible development hasn't started yet, and any handling carries unnecessary risk.
- Days 4 to 6: The first window. A fertile egg should show early veining and a dark embryo spot if development is on track.
- Day 7 to 10: The ideal check. Differences between fertile and infertile eggs are clear and reliable at this stage.
- Day 12 onward: A second look if needed. By now a fertile egg is noticeably dark and opaque. Anything still clear after day 10 is almost certainly infertile.
- Day 18 and beyond: If there's no sign of pipping or movement, the clutch is finished. Finch eggs typically hatch between days 12 and 16, so anything past 18 days with no activity is unlikely to change.
I usually do one focused check around day 7 and leave it at that unless something looks wrong.
How to Candle a Finch Egg
Candling sounds more complicated than it is. You need a small, focused light source and a dark room. That's essentially it. Here's how I do it:
- Wait until evening. The parents are usually calmer at night, and a darker room makes it much easier to see through the shell.
- Use a small LED flashlight. A narrow beam works best. Avoid anything with a hot bulb that could warm the egg. Phone flashlights work fine in a pinch.
- Wash your hands and warm them. Cold hands stress the egg more than the handling itself does. Dry your hands fully before touching anything in the nest.
- Pick up the egg gently. Cup it between your thumb and index finger. Don't squeeze. Hold it up to the light source at the wider end and rotate it slowly.
- Look for development signs. You have about 20 to 30 seconds before you want to return the egg. Keep it brief.
- Return the egg to the same position. Finches are sensitive to changes in their nest arrangement. Set it back exactly as you found it.
- Step away quietly. Give the parents a few minutes to settle before you check on them again.
The whole process takes under a minute once you're comfortable with it. The key is doing it calmly and rarely, not frequently and anxious.
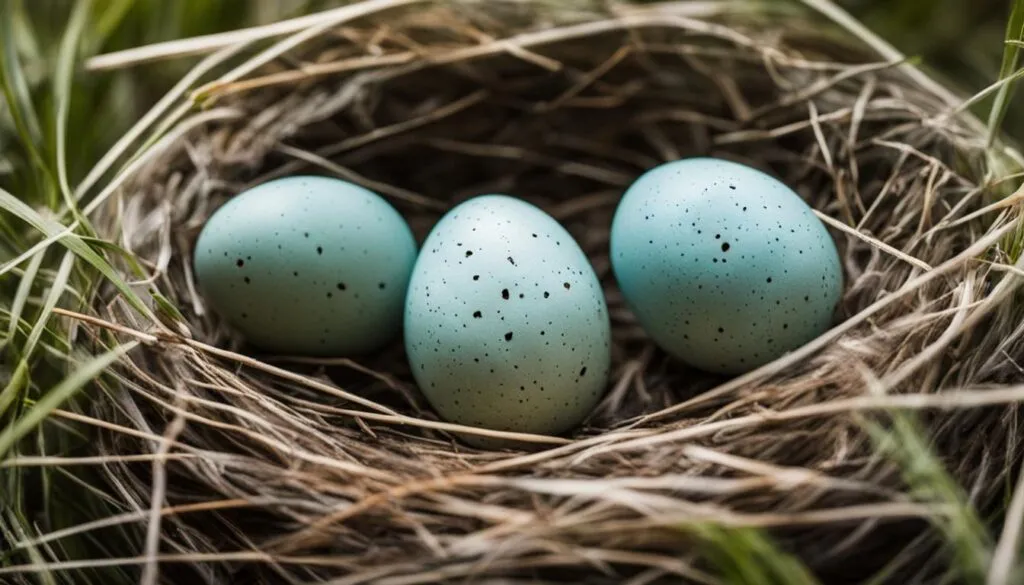
What a Fertile Egg Looks Like
Once you've candled a few eggs, the signs of fertility become easy to read. A developing egg looks noticeably different from an empty one. Here's what to look for:
- A dark central spot. This is the embryo. By day 5 or 6 it should be visible as a small, dense shadow near the middle of the egg.
- Branching veins. The most reliable fertility sign. Fine red or dark lines spread outward from the embryo like a spider web. These are the first blood vessels forming.
- Increasing opacity. As incubation progresses, the interior gets darker and less see-through. A fertile egg at day 10 looks nearly solid when candled.
- A defined air sac. At the wide end of the egg, a clear rounded space forms and grows larger over time. This is where the chick will eventually pip.
- Movement. Around days 8 to 10, a developing embryo may visibly respond to the light with a small shift or shadow movement.
If you see veins and a dark spot together, you're looking at a fertile egg. That's the confirmation.
What an Infertile Egg Looks Like
Infertile eggs are easier to identify once you know what fertile ones look like, because the comparison is stark. When you candle an infertile egg, you'll notice:
- Clear or very slightly cloudy interior. No structure, no dark spots. The yolk may be visible floating freely inside.
- No veining whatsoever. An infertile egg stays smooth and empty-looking under the light, even after a week of incubation.
- A yellowish or light orange glow. This is just the yolk with no development around it. It often looks uniform and static.
- No air sac definition. The wide end looks the same as the rest of the egg.
If the egg still looks empty and clear on day 7 or beyond, it's infertile. Leave it a few more days if you're uncertain, then remove it once you're sure.
Dead-in-Shell Eggs and How to Spot Them
A third category trips up a lot of breeders: eggs that started developing but stopped. These aren't infertile, but they won't hatch either. Signs include:
- A dark, dense mass inside the egg with no visible veining or movement.
- Irregular or blotchy discoloration across the shell or interior.
- A foul or unusual smell if the egg is cracked or has been compromised by bacteria.
- No air sac growth despite otherwise dark contents.
Dead-in-shell eggs can be caused by a bacterial infection, a temperature drop during incubation, nutritional gaps in the parents' diet, or simply a developmental issue. Remove them from the nest carefully. A compromised egg sitting next to healthy ones can contaminate the rest of the clutch.
Why Fertility Fails: What to Check
When most of a clutch comes up infertile, it's worth looking at the conditions around the pair before writing off their breeding potential. The most common causes:
- Nutrition. A diet heavy on seed alone won't support reliable fertility. Both parents need protein (egg food, mealworms), calcium, and vitamin E during the breeding season. These are the nutrients most directly tied to egg development.
- Temperature instability. Cold drafts near the cage can interrupt the pair's breeding rhythm and affect egg development even after laying.
- Bird age. Very young finches, especially in their first breeding season, often produce infertile or poorly-developing clutches. Older birds sometimes show declining fertility too. This is normal and tends to stabilize.
- Pair compatibility. Not every pair bonds well enough to produce fertile eggs. If a pair consistently produces infertile clutches after two or three attempts, it's worth pairing them with different partners.
- Incubation interruptions. If the parents are abandoning the eggs frequently or sitting inconsistently, the temperature inside the shell fluctuates. Even a briefly fertile egg can stop developing under these conditions.
If you're seeing repeated failures, the troubleshooting guide for failed breeding attempts covers these issues in much more detail and is worth reading before you change pairs or setup.
When and How to Remove Infertile Eggs
Once you're confident an egg is infertile, you have a choice. Leaving it in the nest lets the parents continue incubating it, which delays their next breeding cycle. Removing it frees them to try again sooner. My approach:
- Don't remove anything before day 10. The window for late fertility signs is still open.
- Handle the pair's disposition before you act. Some pairs are relaxed about nest access. Others abandon everything if disturbed. Know your birds.
- Remove infertile eggs in one pass rather than gradually over several visits.
- If the entire clutch is infertile and the pair is still sitting devotedly, wait until the incubation period would have ended naturally before removing eggs. Abrupt removal can cause stress.
Removing infertile eggs is not urgent, but it is useful. The pair can reset and start fresh with better nutrition, adjusted conditions, or a more stable environment. Understanding how long finch eggs take to hatch helps you know exactly when the window has closed and removal makes sense.
Reading the Parents as a Secondary Signal
Candling gives you objective information, but the parents often tell you something too. I don't rely on behavior alone, but I use it as context alongside what I see under the light.
- A pair taking turns faithfully, sitting tightly, and reacting protectively when you approach the nest is almost always incubating something they sense is developing.
- A pair that stops sitting consistently, spends time away from the nest, or seems indifferent is often responding to infertile eggs.
- Finches won't abandon a clutch entirely at the first sign of failure, but their commitment level usually reflects what they're detecting inside the shell.
These behavioral cues don't replace candling, but they can tell you whether a second look is worth taking or whether the eggs are likely fine.
FAQs: Fertile vs Infertile Finch Eggs
Here are the questions I hear most often about candling and egg identification:
Can I candle eggs right after they're laid?
You can, but it won't show you anything useful. Development doesn't become visible until days 4 to 6 at the earliest. Handling eggs in the first few days also carries more risk with no benefit, so I always wait until at least day 4 before the first check.
Do I need special equipment to candle?
No. A small LED flashlight and a darkened room are enough. I used a basic pen light for years before upgrading to a candling tool. The key is a focused, narrow beam rather than a wide flood of light. Just avoid anything with a hot bulb that could warm the egg during handling.
What if an egg looks fertile at day 7 but nothing hatches?
Development can stop at any point during incubation. An egg that showed veins at day 7 may still become a dead-in-shell egg if conditions shift or if there was a developmental issue with the embryo. This is one of the harder parts of breeding. Once you know what stopped things, you can adjust for next time. Reading up on the baby finch growth timeline gives useful context for what normal development looks like at each stage.
Is it normal for some eggs in a clutch to be fertile and others not?
Yes, completely. It's common for a clutch to have a mix of fertile and infertile eggs. The fertile ones proceed normally. The infertile ones can be left in place or removed after confirmation. If chicks do hatch, you may want to be ready with information on hand-raising finch chicks in case the parents need help.
How long does incubation last for finches?
Most pet finch species incubate for 12 to 16 days. Zebra finches tend to be on the shorter end of that range. Anything past 18 days without pipping or movement is almost certainly not going to hatch.
What the Eggs Are Telling You
Candling is just a tool, but over time it becomes one of the most informative parts of breeding. Every clutch tells you something: about the pair's health, the diet, the environment, the consistency of incubation. Fertile eggs with strong vein development say the pair is well-conditioned and the setup is working. A run of infertile clutches says something needs to change.
Once you get comfortable reading what you see under the light, the whole breeding process becomes a lot less mysterious. You stop waiting and wondering and start making small, informed adjustments. That's when breeding finches gets genuinely satisfying.